Arugula microgreens promise peppery punch in seven to ten days, but most first-time growers end up with a tray of bitter, stringy disappointment. The difference between a delicate, nutty bite and a mouth-puckering mess comes down to three controllable variables: light intensity, temperature, and harvest timing. Get any one wrong, and your microgreens will taste like they’re punishing you for trying.
Seed density: the foundation of even growth
Arugula seeds are tiny, round, and slippery. Scatter them too sparsely, and you’ll harvest a patchy tray with wasted growing medium. Pack them too tight, and you’re inviting mold, weak stems, and uneven germination.
Aim for one to two seeds per square centimeter—about 10 to 15 grams of seed per standard 10×20-inch tray. Spread them by hand in a single, even layer. They should nearly touch but not pile on top of each other.
Press the seeds gently into pre-moistened soil or coco coir using a flat board or your palm. This contact is critical: arugula germinates faster and more uniformly when the seed coat stays in firm contact with moisture. Skip this step, and you’ll see patchy germination and delayed growth across the tray.

Blackout phase: yes, but keep it short
Arugula does benefit from a blackout period, but only for the first 24 to 36 hours. During this window, seeds focus energy on root development and initial stem elongation without the distraction of light.
Stack your trays or cover them with an opaque lid. Keep the environment between 65°F and 72°F (18°C to 22°C). Any warmer, and germination speeds up but flavor suffers. Any cooler, and growth stalls.
After 36 hours, uncover the tray and move it under light immediately. Arugula is a fast grower—if you leave it in the dark too long, stems will stretch tall and pale, searching for light. Those leggy, weak stems never recover their flavor or texture.
Bottom-watering: the mold-prevention strategy
Arugula’s dense canopy traps moisture. Top-watering with a spray bottle or watering can creates the perfect conditions for damping-off fungus and white mold, especially in the first three to five days when stems are still tender.
Instead, water from below. Place your growing tray inside a slightly larger tray filled with half an inch of water. Let the soil or growing medium wick moisture upward for 10 to 15 minutes, then remove the water tray.
Repeat this process once daily, or twice if your environment is very dry. The goal is to keep the root zone moist but the surface and stems dry. Good air circulation helps—run a small fan on low speed near your trays, but not aimed directly at the seedlings.

Ideal harvest window: catch them early
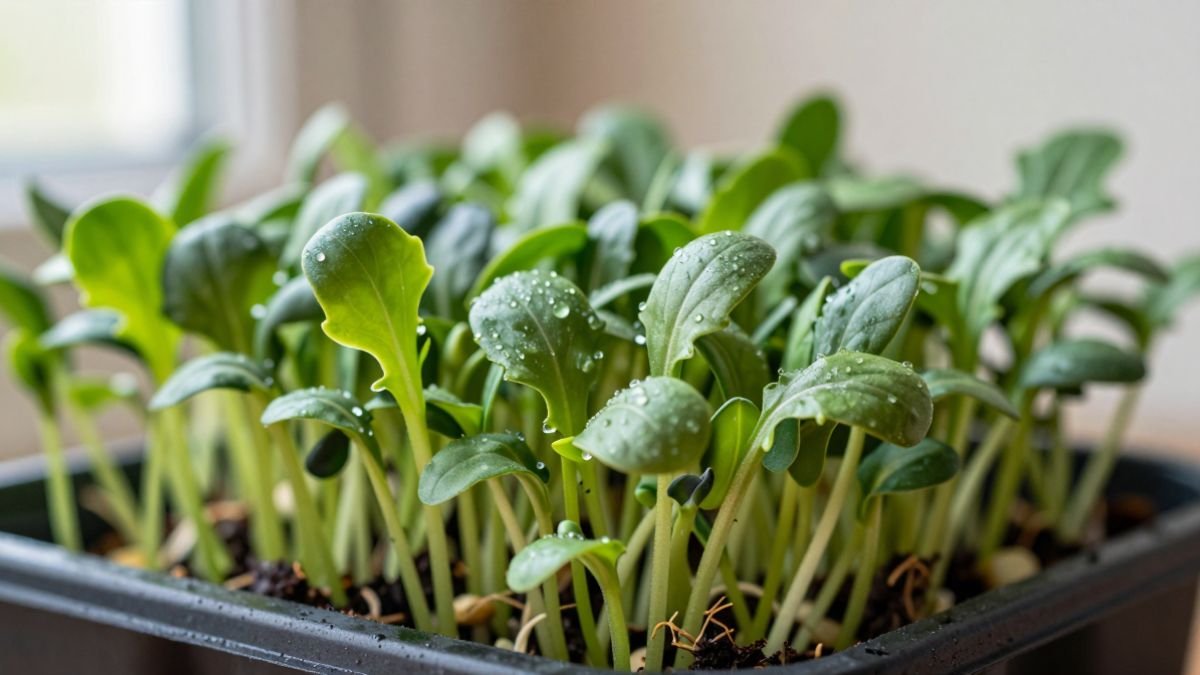
Arugula microgreens are ready to harvest when the first true leaves appear—usually between day seven and day ten after seeding. At this stage, flavor is bright, peppery, and complex, with a hint of nuttiness.
Wait even one extra day, and the flavor shifts. The greens begin producing glucosinolates and other sulfur compounds in higher concentrations as they mature. This is the plant’s natural defense mechanism, and it translates to harsh bitterness on your palate.
Harvest in the morning, right after the greens have had a chance to firm up overnight. Use sharp scissors and cut just above the soil line. Rinse gently in cold water, spin dry, and store in a breathable container in the refrigerator. They’ll hold peak flavor for three to four days.
Common mistakes that ruin flavor
Even experienced growers slip up on arugula. Here are the traps that turn a promising tray bitter:
Growing too warm. Arugula is a cool-season crop. Temperatures above 75°F (24°C) accelerate growth but also trigger stress responses that concentrate bitter compounds. If your growing space is warm, move trays to a cooler spot or grow arugula in late fall, winter, or early spring when indoor temps naturally drop.
Overwatering or poor drainage. Soggy roots stress the plant and encourage root rot. Both problems make the greens taste off—metallic, musty, or overly sharp. Always ensure your growing medium drains freely and never let trays sit in standing water for more than 15 minutes.
Harvesting too late. This is the number-one flavor killer. Arugula grows fast, and the window between “perfect” and “too bitter” is narrow. Mark your seeding date on the tray with a label or piece of tape, and start taste-testing on day seven. If the flavor is already too strong, harvest immediately—it won’t mellow.
Inconsistent light. Arugula needs 12 to 16 hours of bright light per day once it’s out of blackout. Weak or inconsistent light causes slow, uneven growth and pale, flavorless greens. If you’re using a grow light, keep it 6 to 12 inches above the tray and adjust as the greens grow.
Using old seed. Arugula seed loses viability faster than many other microgreens. If germination is patchy or slow, your seed may be past its prime. Buy fresh seed annually from a reputable supplier, and store it in a cool, dry place in an airtight container.

Why arugula microgreens are worth the precision
When you get the variables right, arugula microgreens deliver intense flavor in a small package. They’re ready faster than almost any other microgreen, they’re packed with vitamins A, C, and K, and they add a bold, peppery kick to salads, sandwiches, grain bowls, and garnishes.
The sharper-than-expected taste isn’t a flaw—it’s arugula’s signature. But bitterness is. By controlling seed density, blackout duration, watering method, harvest timing, and growing temperature, you can grow trays of arugula microgreens that taste exactly as they should: bright, peppery, and clean, with no harsh aftertaste.
Start your next tray today. Mark your calendar for day seven. Taste one stem. If it’s perfect, cut the whole tray. If it’s already too sharp, you’ve learned your lesson for next time—and that lesson is simple: arugula waits for no one.